How I made a shortcut to toggle among proxy settings on Ubuntu
Hi
In this post, I write about how to create a simple bash script from scratch to toggle between proxy settings on a linux system. I cover some of the basics of writing, executing the script and making it a command for terminal. Later I create a shortcut for quick execution of it as well.
Note: This post addresses the general proxy settings in network settings (usually done via GUI) not the apt/aptitude settings. And since Linux has its own ‘environments’ and every terminal your start usually starts as a subshell having its own basic settings, this isn’t about the terminal proxies.
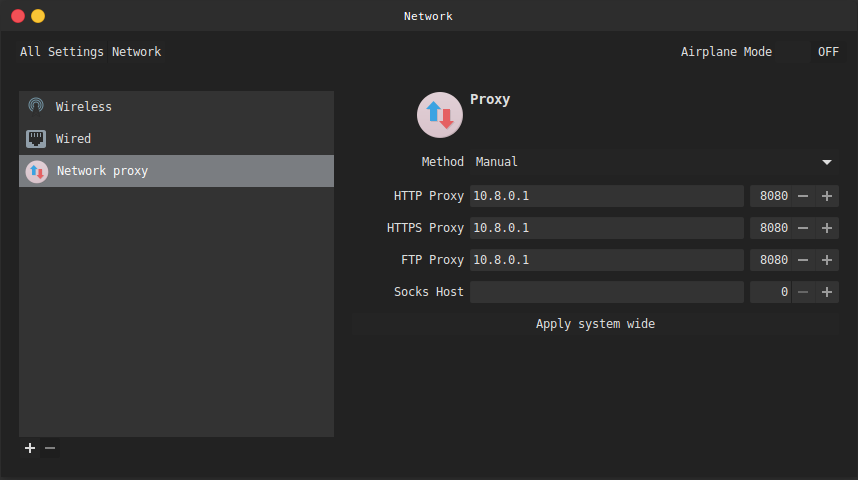
How did the need to make this arise? Since we have two ISPs in the campus, it results in two proxy servers. Say in region 1 (hostel area), the host is 10.7.0.1 and in region 2 (academic block) its 10.8.0.1 with 8080 being the proxy port for both cases. If you’re in a similar situation, modify the script according to your needs. :)
On a linux system, changing the proxy settings everytime my region changes, or say, if I don’t need a proxy it’s a bit tedious long process of going to settings, typing in the proxies and ports, clicking the apply button, typing in the admin password and then hitting the ‘OK’ again. Long, isn’t it? And I’m a lazy person (“Cheers to all the lazy people out there!”)

Anyways, so here’s how I made this long task just a single keyboard shortcut away! :D
Start a terminal and lets begin!
Create a file named switchProxy.sh in say your home folder.
$ touch switchProxy.sh
Now, since this file will be executed, it should have execute permissions. Open the file in your favorite editor.
$ chmod +x switchProxy.sh
Let’s begin writing the shell script!
Starting with the Shebang which states which interpreter to use while executing.
#!/bin/sh
Some comments do no harm. (optional)
# This script helps quickly toggle between proxy settings for a local network. I made it for my college's WiFi network.
Next, we assign values of the current proxy mode and host to respective variables using the following lines.
Note that the = sign doesn’t have space on its left and right. This is necessary in shell scripting as to tell the interpreter that you’re doing an assignment and not a test.
 curr_mode=$(gsettings get org.gnome.system.proxy mode)
 curr_proxy=$(gsettings get org.gnome.system.proxy.https host)
varName=$(command) assigns the result that command returns when run to the variable varName. gsettings is an API (Application Programming Interface) used to view/edit the key-value pairs on a Ubuntu/Gnome based system without actually having to dive into the system settings. Run any of the above commands, say gsettings get org.gnome.system.proxy.https host in a terminal and you’ll know what it does.
Currently, we know there are three settings to toggle between. Now, the following can be done other ways as well, but I’ve made a basic cyclic algorithm to make the toggling simple. Following is the logical part of code.
if [ $curr_mode = "'manual'" ] && [ $curr_proxy = "'10.8.0.1'" ]
then
    echo 'Switching proxy to "none".'
    gsettings set org.gnome.system.proxy mode 'none'
    notify-send --urgency=critical switchProxy "Proxy switched to 'none'."

elif [ $curr_mode = "'none'" ]
then
    echo 'Switching proxy to "10.7.0.1:8080".'

    gsettings set org.gnome.system.proxy mode 'manual'
    gsettings set org.gnome.system.proxy.https host '10.7.0.1'
    gsettings set org.gnome.system.proxy.https port '8080'
    gsettings set org.gnome.system.proxy.http host '10.7.0.1'
    gsettings set org.gnome.system.proxy.http port '8080'
    gsettings set org.gnome.system.proxy.ftp host '10.7.0.1'
    gsettings set org.gnome.system.proxy.ftp port '8080'

    notify-send --urgency=critical switchProxy "Proxy switched to '10.7.0.1:8080'"

elif [ $curr_proxy = "'10.7.0.1'" ]
then
    echo 'Switching proxy to "10.8.0.1:8080".'

    gsettings set org.gnome.system.proxy mode 'manual'
    gsettings set org.gnome.system.proxy.https host '10.8.0.1'
    gsettings set org.gnome.system.proxy.https port '8080'
    gsettings set org.gnome.system.proxy.http host '10.8.0.1'
    gsettings set org.gnome.system.proxy.http port '8080'
    gsettings set org.gnome.system.proxy.ftp host '10.8.0.1'
    gsettings set org.gnome.system.proxy.ftp port '8080'

    notify-send --urgency=critical switchProxy "Proxy switched to '10.8.0.1:8080'."
fi
Too much at once? It’s just successive if else statements with the same commands but different arguments and test conditions written in the standard shell-scripting syntax.
Note again that spaces around the [ and ] are a must! Since [ is a symbolic link to the program test and programms require a space to differentiatie the ] is required to end the conditon.
echo which simply “echos” - prints whatever you give as an argument to it, is used here to print the status. And the last part - The notify-send utility is used to send a notification to the screen. Notification similar to the ones we see when we connect to a WiFi AP or change the volume. --urgency=critical is used because in many cases, the notification isn’t actually shown even though the proxy has been modified.
Syntax for notify-send can be found on its man-page or in the references below.

This completes the script. you can try running with the following command (Assuming that you’re in the directory with the script in it.)
$ ./switchProxy.sh
Successful execution echos the corresponding message and displays a notification on the top right corner.
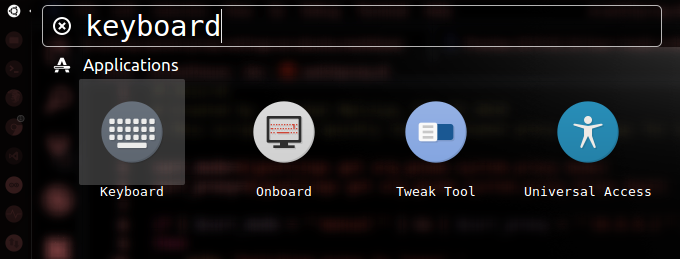
Finally, go to the keyboard settings from unity launcher.

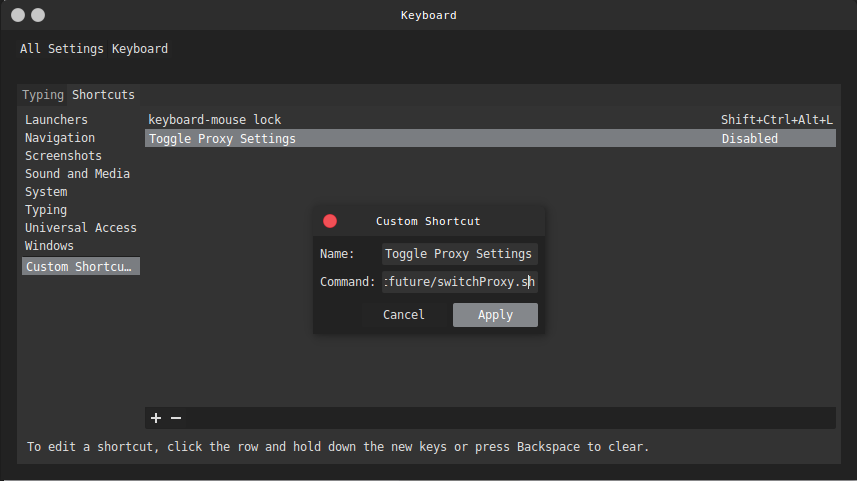
On the Shortcuts tab, Navigate to the Custom Shortcuts menu and click the + icon at the bottom.
Name the shortcut and the absolute path to the script. If you’ve followed the tutorial, it’d be /home/<your username>/switchProxy.sh and click Apply.

Click on the right where it says ‘Disabled’ and press the keys Shift+Ctrl+Alt+P to make this your keyboard shortcut. You can make it of your own choice given that your choice isn’t already a shortcut to something on the system.
Alternatively, you can move the script to say /usr/bin/ with superuser rights and you’ll be able to run the script directly by typing in switchProxy.sh in terminal. Just like any other Linux command. Typing in just the name of the script in the Command field while creating the shortcut will get the job done!
I’m aware that many improvements can be done to the above script. This is more of some basic stuff I wanted to start with hence I’m stopping here for now.
Feel free to comment below in case of a confusion. Suggestions are always welcomed. :)
You can find the code on GitHub. Don’t forget to star the repo if this helps you lazy lads out there! :D